How to Install Compression Fittings: A Step-by-Step Guide
Compression fittings are the simplest fitting to install yourself. Learn how to do it here.
Last Updated: Sep 2, 2024
Compression fittings are a very popular choice for DIYers and plumbers alike for connecting pipes due to their ease of installation, reliability, and versatility. Whether you’re working with copper, plastic, or other types of piping, compression fittings have stood the test of time to provide a leak-free connection without the need for soldering or heat.
In this guide, we’ll take you through the steps to install compression fittings correctly, ensuring a secure and lasting connection for your plumbing projects.
Compression
Flowflex Compression fittings, including Type A, Type B, PEX, and Large Bronze Flange Fittings, offer secure, leak-free connections, easy installation, and durability. They ensure flexibility in plumbing, are corrosion-resistant, and provide robust performance, enhancing the efficiency and reliability of HVAC systems.
What Are Compression Fittings?
Compression fittings consist of three main components: a compression nut, a compression ring (also known as an olive), and a fitting body. When assembled, the compression ring is compressed between the nut and the fitting body, creating a tight seal around the pipe. This seal provides a waterproof connection which can be easily dismantled if needed.
Using Compression Fittings With Copper Pipe
Preparing The Pipe
Preparing your pipework is an essential first step to ensuring that your make a strong and leakproof connection. Follow our steps here to get the best results:
Equipment
Tools
- Pipe Cutter
- Deburring Tool
- Hand Protection
Supplies
- Copper Pipe
Installation Steps
Cut Your Pipe To Size
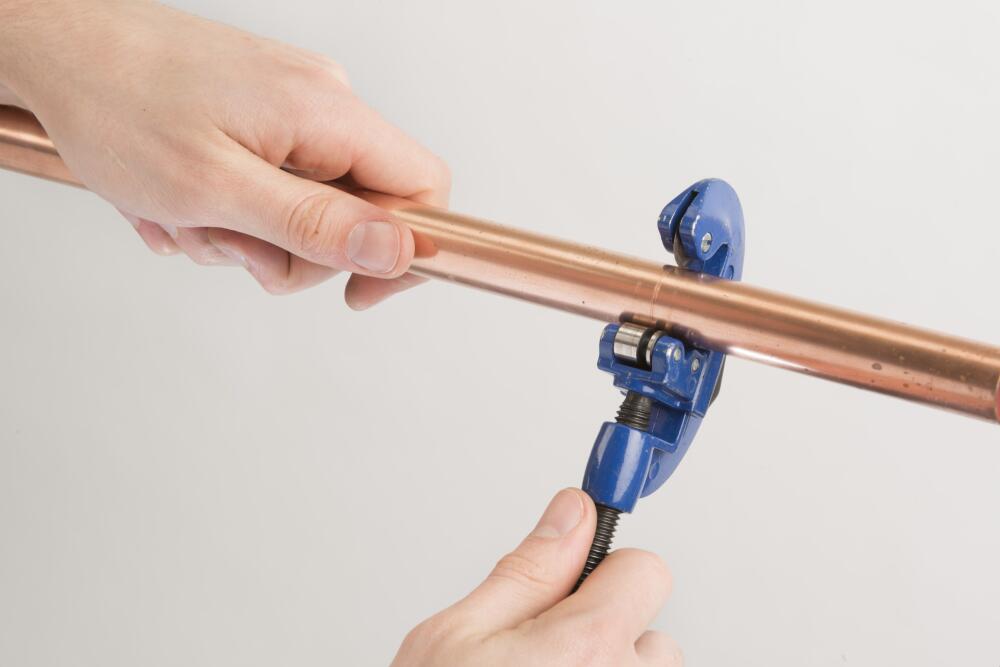
Cut your pipe cleanly across the tube diameter using a good quality pipe cutter or rotary pipe cutter.
Cut Your Pipe Accurately
It is important to ensure that the pipe ends are clean and cut square. Failure to do so could impact on the quality of your jointing. If your cut is not flat, or your pipe is too short, the pipe may not hit the pipe stop compromising the joint integrity. Too long and you may introduce strain into the whole system.
Clean The Socket Of The Pipe
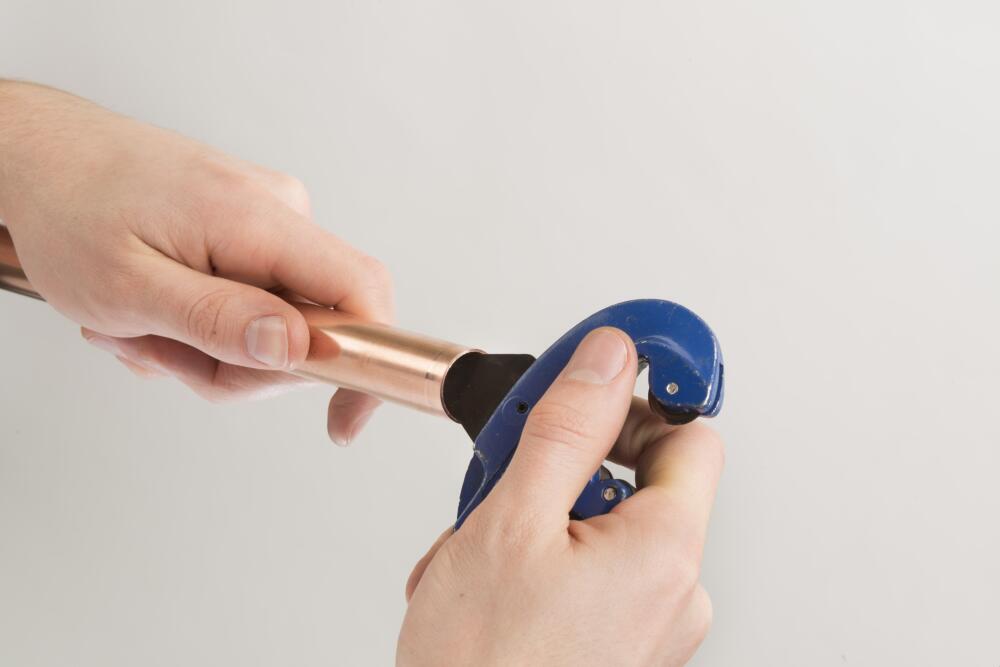
Using your deburring tool, make sure the inside of the pipe is smooth and will not interfere with the flow.
Clean The Outside Of The Pipe
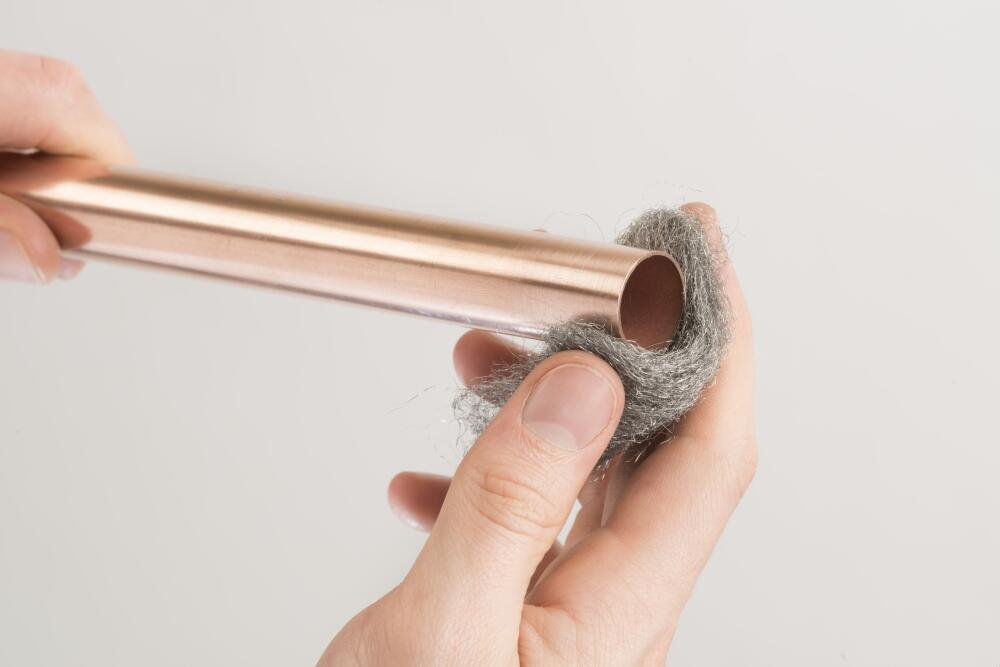
Clean the outside of the pipe, making sure that there is no pipe residue, dirt or grit is present near the joint. Failure to remove all oxides and any material where the fittings and tube overlap can interfere with the capillary action and thus will reduce the strength of the soldered joint, resulting in failure.
To the same effect, over zealous cleaning can result in too much material being removed, resulting in a loose fit and failure.
Installing Your Compression Fittings
Once you have prepared your copper pipe correctly, you can go ahead and make your joint:
Equipment
Tools
- Adjustable Spanners
Supplies
- Compression Fittings
- Copper Pipe
Installation Steps
Assembly The Fitting Around The Tube
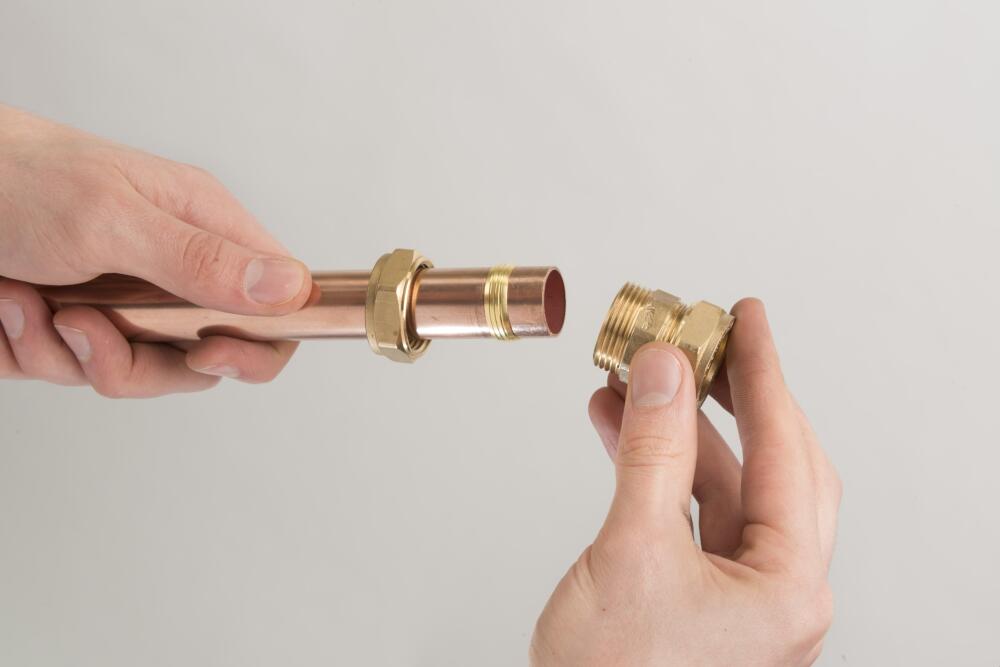
Remove the compression nut and compression olive, then put the nut on the tube, followed by the olive. Insert the tube end up to the fitting's tube stop. Slide the olive and the nut down to the fitting body. Tighten the nut using your fingers to secure the fitting in place.
Only Use Flowflex Olives with Flowflex Compression Fittings
Warranty only valid when compression fittings are used with Flowflex olives supplied with the fitting.
Tighten The Nuts
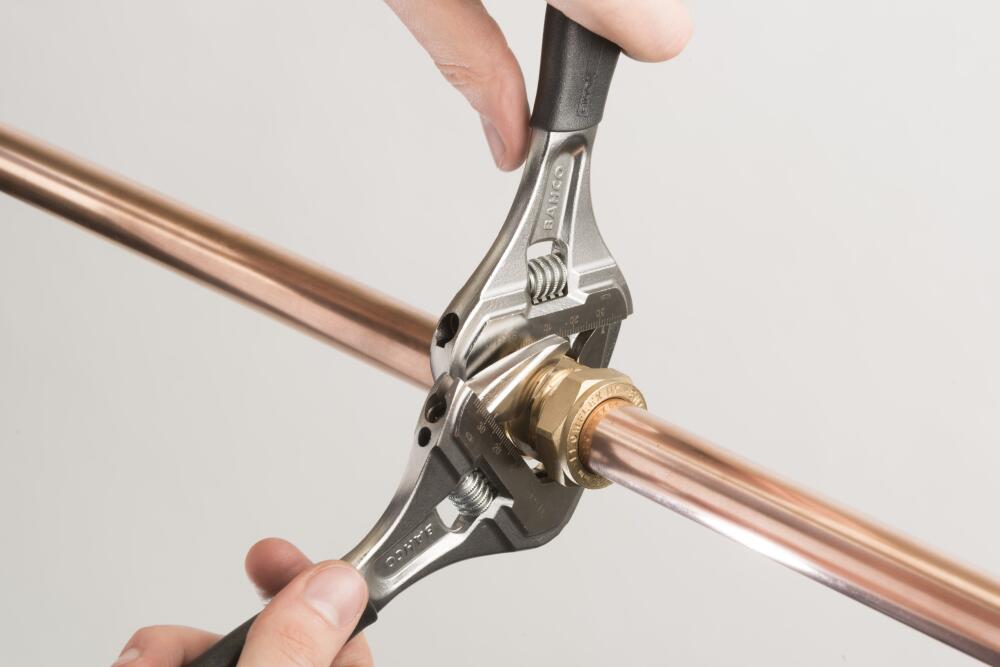
Tighten the nut further using open ended or adjustable spanners, using the spanner flats incorporated into the fitting body and nut. The second spanner must be used to prevent the fitting rotating as the nut is tightened.
A few drops of light oil can be used on the threads to assist the turning. This can be especially helpful on sizes 35mm and above. When jointing stainless steel or annealed (R220) copper tube some variation may be needed – the nut may be tightened further if necessary.
Do not overtighten the nuts
Over-tightening can be detrimental to both the nut and the olive, weakening the joint and causing issues later when servicing. Please see below for more information on guidance on how to tighten your Flowflex Compression Fittings.
Size | Turns |
|---|---|
< 28mm | 1 1/4 Turns |
>= 28mm | 3/4 Turns |
Torque Settings
Size | Torque |
|---|---|
15mm | 30 - 35 Nm |
22mm | 45 - 50 Nm |
28mm | 55 - 60 Nm |
35mm | 105 - 110 Nm |
42mm | 150 - 155 Nm |
54mm | 240 - 245 Nm |
Wrapping Up
Installing compression fittings is a straightforward process that can be completed with basic tools and a little know-how. By following the steps outlined in this article and paying attention to details like pipe preparation and proper tightening, you can achieve reliable, leak-free connections in your plumbing projects.
Compression fittings offer a versatile and reusable solution, making them an excellent choice for both professional plumbers and DIY enthusiasts.
Related Articles
Any Questions?
Our team is available for you anytime.